
Following this process will help ensure success on your next job
Preparation is the most important factor when it comes to the success of your cabinet repaint job. Failing to properly prep can result in peeling, chipping, or cracked paint—and a strong likelihood of a costly callback.
“Prep is the key,” says Dennis Fiorilli, Director of Product Excellence at Sherwin-Williams. “With any paint project, I recommend clean, dry, dull and sound.”
Here are five steps you should take during the prep process to ensure a successful cabinet repaint.
Step 1: Protect and prep. If you’re doing the spraying on-site, then your prep should also involve separating out the work area from the rest of the home. E-Z Up® Dust Containment Poles and Magnetic Zipper, along with painter’s plastic, can be a great way to section off the area in question. To prevent against overspray, use a heavy-duty paper like X-Board® to protect the floor, and use a masking system—such as the 3M M3000 Hand Masker—to mask off windows and other areas.
Step 2: Safety. The dust or fumes created by removing old paint can contain lead.* Make sure to take appropriate precautions when repainting cabinets, including using properly-fitted respirators to protect yourself and your team. The 3M Paint Project Respirator with Quick Latch, which can be easily taken on or off with no strap adjustment needed, is a great option.
Step 3: Clean before coating. Grease and oils naturally build up on kitchen cabinetry over time. For best results, make sure to clean them before repainting. Fiorilli says, “Spray Nine Cleaner/Degreaser is a go-to for me when prepping cabinets. I like to do a quick wipe-down of the cabinets, then sand, and clean again using Spray Nine. This ensures that all contaminants are removed, including grease, grime, and dust.”
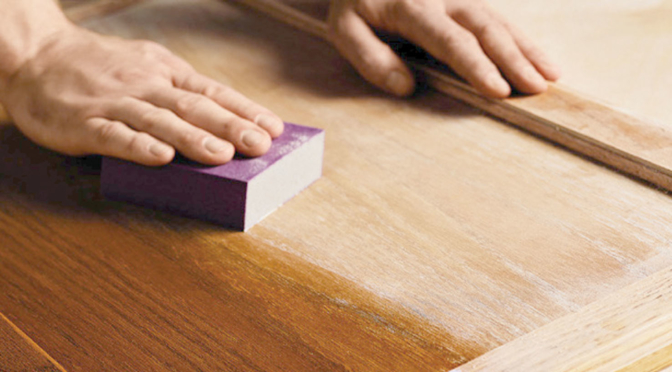
Step 4: Prime and sand. Priming and sanding are often useful when repainting cabinets, but may not be necessary depending on your coating and the cabinet’s previous condition. For specific sanding and priming recommendations, check out Fiorilli’s recent ProPartner™ column where he breaks down best practices for laminate/previously painted cabinets, worn-down/previously stained-and-sealed cabinets, and varnished kitchen cabinets with latex finish paint. Good primer options include Extreme Bond Primer and Extreme Block Interior/Exterior Stain-Blocking Waterbased Primer. And with grits available for each step of the way, 3M’s Pro Grade Precision Sandpaper and Sanding Sponge will help you get premium results fast.
Step 5: Patching. While some painters like to use caulk to patch holes or imperfections in cabinet surfaces, painting over caulk can be tricky if you’re using a coating that dries quickly, as it can cause cracking. For best results, Fiorilli recommends using a quality wood filler or putty, such as the Sherwin-Williams Wood Filler or Bondo Glazing and Spot Putty. These products both dry quickly and easily sand.
Conclusion
Once prepped, you’re ready to begin the repainting process. For a flawless, factory-like finish, consider using Gallery Series™ Waterborne Topcoat. Gallery Series dries to the touch in 30 minutes and can be sanded or recoated in as little as 45 minutes, allowing you and your team to finish jobs faster. And its hard, durable finish meets Kitchen Cabinet Manufacturers Association® (KCMA) requirements when properly applied.
“What I like about Gallery Series is I can spray all my cabinet doors, and within 45 minutes they’re dry enough for my second coat,” says Amber Flowers, owner of Painted AF in Fort Worth, Texas. “Within a few hours, I can transport them—which is saying a lot, because paint doesn’t dry fast! And I get all that convenience without sacrificing anything in quality.”
By pairing the right coating with proper prep, you can impress your clients with a cabinet repaint they’ll love for years to come.
* WARNING! Removal of old paint by sanding, scraping or other means may generate dust or fumes that contain lead. Exposure to lead dust or fumes may cause brain damage or other adverse health effects, especially in children or pregnant women. Controlling exposure to lead or other hazardous substances requires the use of proper protective equipment, such as a properly fitted respirator (NIOSH approved) and proper containment and cleanup. For more information, call the National Lead Information Center at 1-800-424-LEAD (in the US) or contact your local health authority. Removal must be done in accordance with EPA Renovation, Repair and Painting rule or similar state regulation.