
Properly repairing drywall damage is an important step in producing a professional-looking paint job. In this article, we’ll take a look at solutions for four of the most common drywall issues for pro painters.
1. Holes and scrapes
Holes and scrapes in the drywall are among the most common problems that painters encounter, says Rick Eisfeller, Senior Product Designer at Advance Equipment Manufacturing Company. This can range anywhere from minor scratches to large impact holes to those small nail and screw holes where the homeowner had hung pictures.
For small, denser gouges, the experts at Sherwin-Williams recommend the following tools and products: a retractable razor knife, sandpaper, spackle or joint compound, putty knife and a clean cloth.
Start by cutting away any loose drywall face paper. Then lightly sand the area with a high grit abrasive so no rough paper edges remain. Wipe it clean with a slightly dampened cloth.
If the area is less than 1/8-inch in diameter, use spackling compound to make the repair. For larger, denser scrapes, joint compound is a better choice.
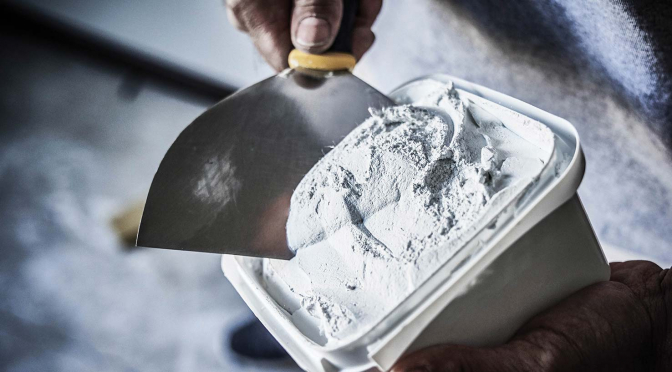
Either way, load your putty knife and draw it across the damaged area at a 90-degree angle. Repeat once or twice to fill the dent and feather off excess compound around the damage site. Allow the compound to dry completely. Because the compound typically shrinks, a second or third coat is likely needed to create a level surface.
Sand lightly between each coat, and before you paint, sand the surface smooth with very fine grit sandpaper and wipe it clean.
Because joint compound is porous, it’s best to prime the repaired area before painting. Otherwise, the sheen and shade of the touch-up paint may not match the rest of the wall.
Drywall compound shouldn’t be used for larger holes, as it may sag and not have the strength required. To make the surface look like new again, instead use a patch kit or a piece of drywall in a butterfly patch or custom fit to the hole.
View a list of recommended drywall compounds and tools on the Sherwin-Williams contractor website
2. Cracks
As a structure settles, cracks may appear below windows or above doors.
To repair a crack, you may need mesh tape in addition to a sharp knife, joint compound, putty knife and fine-grit sandpaper.
It’s not enough to just smear joint compound along the crack. That’s because the crack will just come back. Instead, cut a thin V-shaped groove along both sides of the crack, fill it with joint compound, let the compound dry and sand it smooth.
Next, place mesh tape over the crack and apply joint compound, feathering it onto the wall. Two or three coats may be needed, each time feathering the material eight to 10 inches on either side of the crack.
When the compound is dry and sanded smooth, you’re ready to prime and paint.
3. Pop nails
Pop nails or screws are another common problem.
To fix a pop nail, you’ll need a hammer or electric drill, spackle compound, one to two drywall nails or screws, and fine-grit sandpaper.
Don’t just pound them back in and fill the dent. Instead, press the panel firmly against the stud and drive a new nail or drywall screw an inch or so above the old one. If possible, pull out the pop nail. Fill both dimples with spackling compound as outlined above, adding coats, letting them dry and sanding between coats.
4. Damaged corners
Drywall corners are particularly vulnerable to damage.
To repair drywall corners, you’ll need a 5-in-1 tool, hacksaw, new length of corner bead, cordless drill, metal file, joint compound, putty knife and a drywall sander.
If the metal corner bead is only slightly dented, you can use a 5-in-1 tool to scrape away any loose drywall material. Gently tap the damaged metal section so it’s level and slightly below the surface of the drywall. If necessary, re-secure it with drywall screws or nails. Then apply joint compound, building up layers to cover the corner completely.
If the metal bead is beyond repair, you’ll have to cut out the damaged section with a hacksaw. Then cut a new length of metal bead to replace the section you removed and secure it with four drywall screws, two on each end. File off any rough edges and apply two to three layers of joint compound to conceal the bead. When dry, use a drywall sander to restore a perfect 90-degree angle.
As with any paint job, once the repairs are complete, make sure all surfaces are clean, sound, dull and dry before priming and painting.
The bottom line
A final note for pro painters: Don’t be afraid of doing drywall repair, but do learn how to do it right. Going through all of the repair steps is critical in drywall repair, as it will ensure adhesion as well as the best finish.
“For any kind of paint job that requires repair work, you want a good bond,” Eisfeller says. “It’s very important.”
He uses broken sheetrock as an example.
“If you put mud on broken rock where there’s no paper, the mud’s not going stick to that,” he says. “It’s like dropping mud on the beach. A lot of people put mud right over this stuff and think it’s going to fix it. But it doesn’t bond to it. it’s going to pop, and you’re going to have a crack later.”
To prevent that, he recommends using a good bonding agent such as a spray adhesive. Eisfeller also highly recommends the FibaFuse® line of drywall repair tapes and patches, such as FibaFuse Paperless Drywall Tape, available at Sherwin-Williams.
Eisfuller says there’s a lot of incorrect information about drywall repair on YouTube and other online sources. He’s made it his mission to help people do it right. If you’re interested in learning more, one way is to join his private Facebook Group “Fibafuse Users.” Once you’re ready to tackle the job, you can get the products you need at your Sherwin-Williams store.
Important surface prep safety notes
Warning! Removal of old paint by sanding, scraping or other means may generate dust or fumes that contain lead. Exposure to lead dust or fumes may cause brain damage or other adverse health effects, especially in children or pregnant women. Controlling exposure to lead or other hazardous substances requires the use of proper protective equipment, such as a properly fitted respirator (NIOSH approved) and proper containment and cleanup. For more information, call the National Lead Information Center at 1-800-424-LEAD (in US) or contact your local health authority.
©2022 Northbrook Publishing.