
In this article, PPC’s Ask Your ProPartner™ columnist Rick Watson outlines the five steps pro painters should take to ensure perfect trim, every time.
When it’s time, it’s time. After living in the same house for almost 18 years it was time to update furnishing, wall colors and freshen up the trim.
So over the last few months I have been cleaning up, prepping and painting the entire first floor of my house. I receive quite a few questions about trim and how to paint it. So I figured I would share a little bit of my experiences with you.
1. Clean
After removing the hardware (window blind, valance mounts, etc.), I would recommend that the trim be thoroughly cleaned with a good cleaner degreaser to remove all grease, oils and general contaminants that may build up over time.
On my project, I cleaned the trim using a rag, liquid dishwashing soap and hot water, and then wiped everything down with a clean rag and fresh water.
Once clean, I used a medium-grit sanding sponge* to roughen up the existing paint and to knock off any imperfections on the trim.
2. Patch
A quality flexible wood filler/putty/caulk-sealant should be used to patch holes, imperfections or small cracks on the trim work.
For my project, I used SherMax™ Urethanized Elastomeric Sealant. Unlike non-flexible hard wood fillers, this sealant will flex as needed. And it’s paintable in as little as four hours.
3. Test for adhesion
Because I knew there was an existing latex semi-gloss paint on the trim, I didn’t need a bonding primer to assure adhesion. If I were unsure, I would have followed this process to ensure good adhesion:
After preparing the surface, apply a test area of Extreme Bond Primer. (Because of the exceptional adhesion of this product, sanding may not be necessary for most clean, paintable surfaces.)
Allow the primer to dry properly and test for adhesion.
There are many recognized ways to determine how well a coating has bonded to the surface.
(The infamous “thumbnail test” is not a recognized method. All too often, I hear comments like, “The coating is peeling off when I dig my thumbnail into it.” Coatings must have sufficient time to dry and cure prior to using a standard test method for adhesion. They must be completely cured to achieve accurate results.)
The X-cut tape test is typically used at job sites. Using a sharp blade, two cuts are made into the coating down the substrate to form an X. Masking tape is placed over the X-cut and then removed rapidly. The X-cut area is then inspected for removal of the coating from the substrate or previous coating and rated.
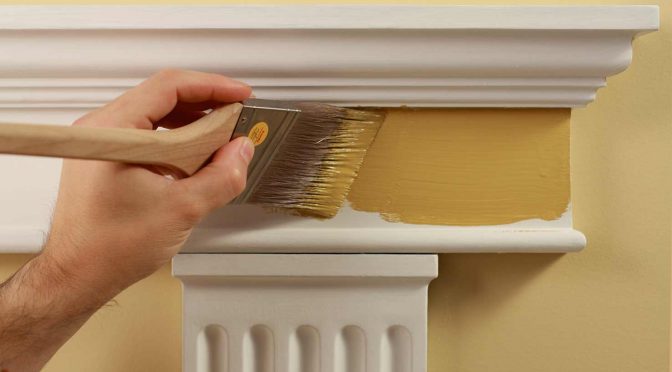
4. Prime and paint
Once you have established good bonding/adhesion, you can prime the entire surface. (Keep in mind that poor adhesion or any surface prep short of clean, dry and dull may compromise the service length of the coatings system you use.)
Like many painters, I like to use a latex finish for ease of application and clean-up. For my project, I used ProClassic® Interior Waterbased Acrylic Semi-Gloss coating. This product has excellent flow and leveling characteristics for a smooth and durable finish on my trim.
Topcoat tips: When using ProClassic® Interior Waterbased Acrylic paint, make sure any paint drips are smoothed out with a brush or roller within 10 to 15 minutes of application.
If you notice any drips after 15 minutes of application, allow the paint to dry for one to two hours and then use a putty knife or razor to remove the affected area. Lightly sand the area if needed, and then repaint.
While making brush or roller strokes, make sure the fresh paint you are overlapping is still wet. This will help you to avoid paint streaks.
So in other words, put it on, brush or roll it out, then leave it alone. The more you try to work it, the more brush and roller marks you will see.
As with most coatings, allow it to dry before applying a second coat. When the second coat is dry to touch, remove all painters’ tape, and put your doors or trim back into service.
5. Caulk
Finally, don’t forget to caulk around the trim frame work. This makes your trim and wall finishes stand out even more. Plus, caulking has the added benefit of keeping unwanted cold air from sneaking into the room.
Bottom line: Good methods and the right tools produce the best results
Also: If you’re using high quality trim enamel or wall paints, don’t skimp on applicators. Using quality tools will help your work look professional.
Tools and equipment have evolved over the years, but still do the same job they always have. Remember the old adage: “You get what you pay for.”
For this job, I used the Purdy® Clearcut Elite™ 2-inch angle brush. This brush was the perfect size for my trim, plus it made my work look like a professional did it. It provided me with excellent cut-in abilities between my walls and baseboards as well as a fine bristle to keep the brush strokes to a minimum.
Important: Read this before you prep
*WARNING! Removal of old paint by sanding, scraping or other means may generate dust or fumes that contain lead. Exposure to lead dust or fumes may cause brain damage or other adverse health effects, especially in children or pregnant women. Controlling exposure to lead or other hazardous substances requires the use of proper protective equipment, such as a properly fitted respirator (NIOSH approved) and proper containment and cleanup. For more information, call the National Lead Information Center at 1-800-424-LEAD (in US) or contact your local health authority.
This article was originally published in the Winter 2016 issue of PPC magazine. Rick Watson, director of Product Information and Technical Services at Sherwin-Williams, answers questions from pro painters in the Ask Your ProPartner™ column in PPC magazine.
Got a question for Rick?
CONTACT US